
Why Epoxy Resin Injection Is the Standard for Foundation Repair
When a concrete foundation develops structural cracks, the repair method must do three things: restore the original tensile capacity across the crack plane, seal the crack against water infiltration, and work without excavating the exterior. Epoxy resin injection accomplishes all three from the interior face of the foundation wall, with no digging, no dewatering, and no landscape disruption.
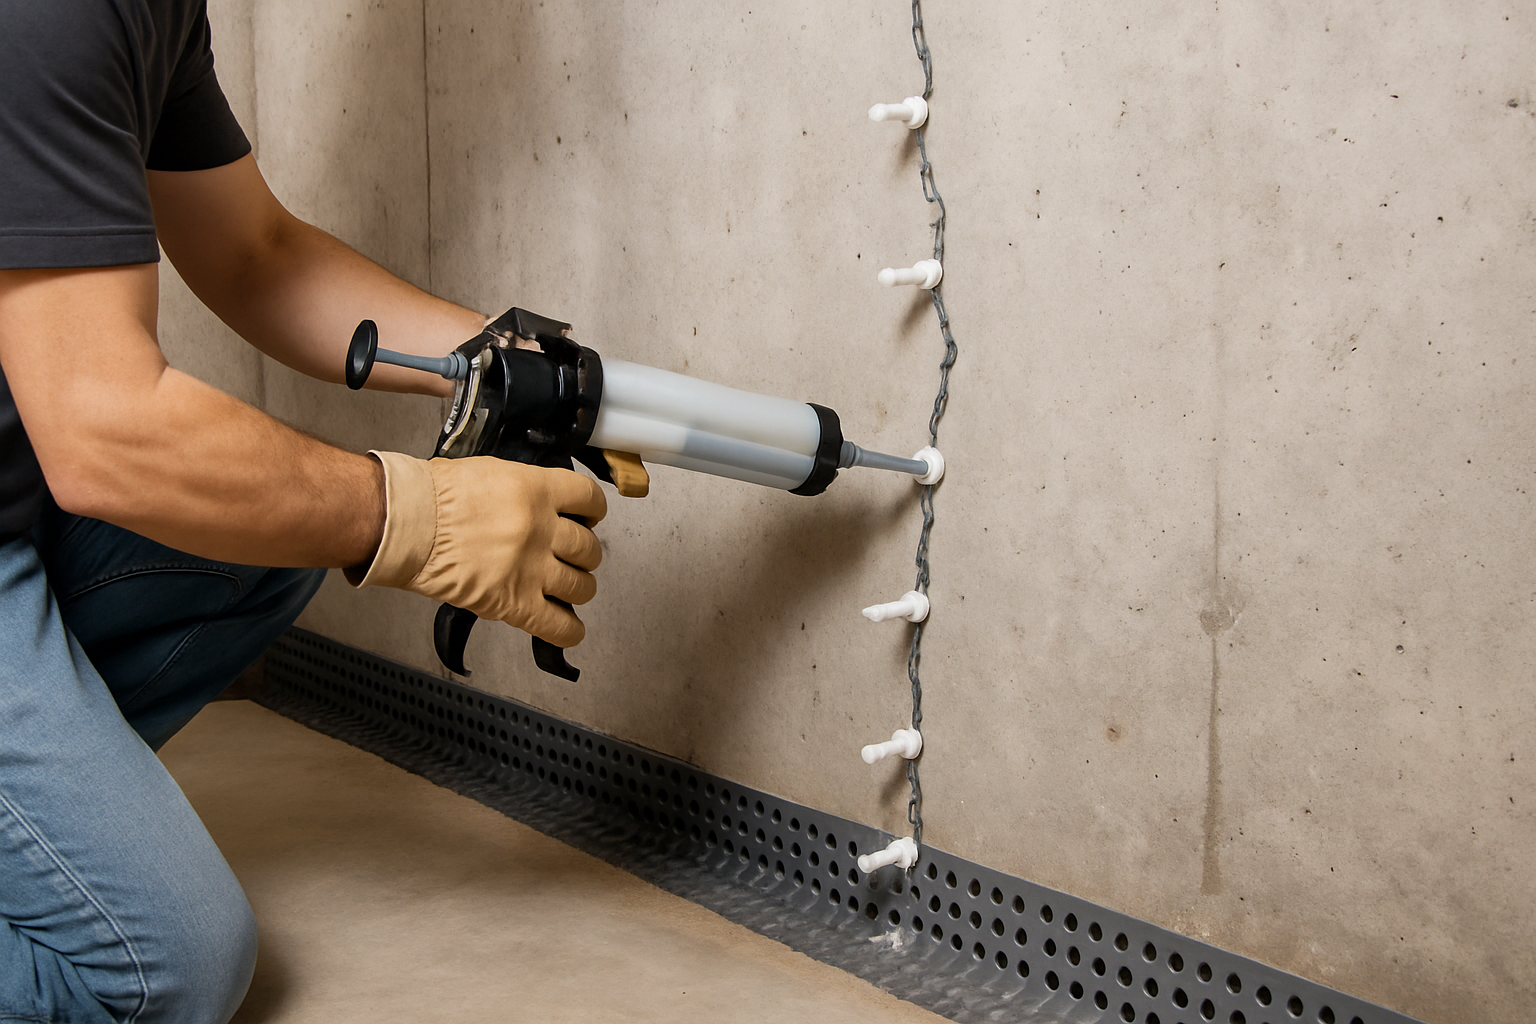
The principle is straightforward: inject a low-viscosity epoxy resin under pressure into the crack. The resin penetrates the full depth of the wall (typically 200 to 400 mm), displacing air and moisture, and cures to a solid that is stronger than the concrete itself. The result is a monolithic repair that restores the structural section to its original capacity — or better.
As a manufacturer of epoxy and polyurethane injection systems for 20+ years, we have supplied materials for foundation repair projects ranging from residential basements to parking structures and industrial facilities. This guide covers the practical engineering of resin injection for concrete foundations.
Types of Resin Injection for Foundation Repair
1. Epoxy Resin Injection — Structural Crack Restoration
Epoxy injection is the method specified by ACI 562 (Assessment, Repair, and Rehabilitation of Existing Concrete Structures) and EN 1504-5 (Products and Systems for the Protection and Repair of Concrete Structures) for restoring the structural capacity of cracked concrete.
How it works: Low-viscosity epoxy resin (150 to 1,500 mPa·s) is injected through ports spaced along the crack at 200 to 300 mm intervals. Injection pressure (0.2 to 0.5 MPa) forces the resin into the full crack depth. The two-component epoxy cures through cross-linking polymerization, forming a rigid solid with tensile strength of 30 to 50 MPa — which exceeds the tensile strength of C30 concrete (approximately 2.9 MPa). Our epoxy injection resins for foundation applications:| Product | Viscosity | Crack Width Range | Tensile Strength | Compressive Strength | Best Foundation Application |
|---|---|---|---|---|---|
| XQ-EI-L (Low Viscosity) | 150–300 mPa·s | 0.1–1.0 mm | ≥ 30 MPa | ≥ 60 MPa | Hairline structural cracks, prestressed pile caps |
| XQ-EI-M (Medium Viscosity) | 800–1,500 mPa·s | 0.5–5.0 mm | ≥ 40 MPa | ≥ 70 MPa | Foundation wall cracks, settlement cracks |
- Structural cracks caused by overloading, settlement, or seismic events
- Dormant cracks (not actively moving) that have been stabilized
- Cracks in foundation walls, grade beams, pile caps, and transfer beams
- Situations where structural capacity must be fully restored
2. Polyurethane Resin Injection — Waterproofing
Polyurethane (PU) injection stops water infiltration through foundation cracks, construction joints, and pipe penetrations. The PU resin reacts with groundwater to form a flexible, closed-cell foam that expands to fill the crack volume and seal against hydrostatic pressure.
When to choose PU for foundations:- Active water leaks through cracks or cold joints
- Live cracks that are still moving (thermal expansion, seasonal settlement)
- Basement walls with seasonal water infiltration
- Foundation-to-slab construction joints without waterstop
| Factor | Epoxy Injection | Polyurethane Injection |
|---|---|---|
| Primary purpose | Structural restoration | Waterproofing |
| Crack type | Dormant (stable) | Active (moving) |
| Bond strength | 3–5 MPa (to concrete) | 0.5–1.5 MPa |
| Flexibility | Rigid (elongation 1–3%) | Flexible (elongation 200–400%) |
| Water reaction | Does not react | Reacts and foams |
| Cure time | 24–48 hours | 2–4 hours |
| Material cost per linear meter | $8–$15 | $3–$8 |
| Can it be used on wet cracks? | Requires dry surface | Works in standing water |
3. Expanding Polyurethane Resin — Soil Stabilization and Slab Lifting
A specialized application: injecting expanding polyurethane resin into the soil beneath a settled foundation to fill voids, densify loose soil, and lift the foundation back to level.
Applications:- Foundation settlement from soil washout or consolidation
- Void formation beneath slab-on-grade foundations
- Slab lifting and releveling (typical adjustment ±25 mm)
- Soil densification beneath spread footings
Foundation-Specific Challenges and Solutions
Challenge 1: Hydrostatic Water Pressure
Foundation walls below the water table experience continuous hydrostatic pressure. At 3 meters below the water table, pressure at the base is approximately 30 kPa (0.3 bar). This pressure pushes resin out of the crack as fast as you inject it.
Solution: Use polyurethane injection first to stop the active water flow. The PU resin reacts with groundwater in 3–8 minutes, forming an expanding foam that seals against the hydrostatic pressure. Once the water is stopped, follow with epoxy injection for permanent structural repair of the now-dry crack.For deep foundations (≥5 meters below water table), use our high-pressure PU formulation rated to 8 bar.
Challenge 2: Single-Side Access
Foundation walls can typically only be accessed from the interior. The exterior is buried in soil. This means injection ports are installed on the interior face only, and you cannot observe resin emergence on the exterior.
Verification method: Track the injection volume. Calculate the theoretical crack volume (width × depth × length) and compare to the actual volume injected. If injected volume exceeds 150% of theoretical, resin is likely penetrating into the soil through the exterior face.Challenge 3: Reinforcement Corrosion Behind Cracks
If a foundation crack has been leaking for years, the reinforcement behind it is likely corroding. Resin injection seals the moisture path and halts further corrosion, but does not repair section loss already incurred.
Assessment protocol:Challenge 4: Multiple Crack Mechanisms
Foundation walls commonly develop cracks from multiple causes simultaneously:
| Crack Pattern | Typical Cause | Recommended Injection |
|---|---|---|
| Horizontal crack at mid-height | Lateral earth pressure | Epoxy (structural) + consider CFRP |
| Diagonal from window/door corners | Stress concentration | Epoxy (structural) |
| Vertical cracks at regular intervals | Shrinkage during curing | PU (waterproofing, non-structural) |
| Step cracks following block joints | Settlement or lateral pressure | PU + evaluate foundation stability |
| Horizontal at wall-to-footing joint | Construction joint without waterstop | PU (waterproofing) |
Step-by-Step Epoxy Resin Injection Procedure for Foundations
Step 1: Assessment and Crack Mapping
Map all cracks on the foundation wall, recording width (use a crack width gauge), length, pattern, and moisture condition. Determine the root cause: settlement, lateral earth pressure, shrinkage, or thermal movement.
Critical: Address the root cause before injection. Injecting a crack while settlement is ongoing is a temporary fix — the foundation will crack again adjacent to the repair.Step 2: Install Injection Ports
- Drill holes at 45° angles to intersect the crack at mid-depth of the wall
- Space ports at 200 to 300 mm intervals (approximately equal to the wall thickness)
- For 200 mm thick walls, drill to approximately 120 mm depth
- Install surface-mount or screw-in injection ports (packers)
- For wider cracks (≥1 mm), surface-mount T-ports bonded with fast-curing epoxy paste are most practical
Step 3: Seal the Surface
Apply fast-curing epoxy paste (our XQ-SS surface seal) along the entire visible crack trace and around each injection port. This creates a pressure dam that forces the injected resin into the crack depth rather than leaking out the surface.
Cure time: Allow minimum 4 hours for the surface seal to cure before starting injection. Premature injection bursts through the uncured seal.Step 4: Inject the Resin
For epoxy injection:Step 5: Cure, Verify, and Finish
After curing (24–48 hours for epoxy, 2–4 hours for PU):
- Core drill through the repaired crack at two locations per 3 meters of crack length
- Split tensile test the core — failure should occur in the concrete, not at the epoxy-filled crack
- If the crack interface fails, the injection was incomplete and re-injection is required
Cost Comparison: Foundation Repair Methods
| Method | Material Cost per Linear Meter | Labor Time | Total Installed Cost (est.) |
|---|---|---|---|
| Epoxy resin injection (structural) | $8–$15 | 20–30 min/m | $25–$50/m |
| PU injection (waterproofing) | $3–$8 | 10–20 min/m | $15–$30/m |
| Exterior excavation + membrane | — | — | $200–$500/m (total) |
| Curtain grouting (injection behind the wall) | $15–$25 | 30–45 min/m | $40–$80/m |
Resin injection is typically 5 to 15 times less expensive than exterior excavation methods. A typical residential foundation repair (10–20 linear meters of cracking) can be completed in a single day with injection, compared to 3–5 days for excavation.
Frequently Asked Questions
How long does foundation crack injection last?
Epoxy injection is permanent. Cured epoxy is more durable than the concrete substrate — it does not degrade under normal foundation conditions (no UV exposure, stable temperature, pH 7–12 environment). PU injection for waterproofing lasts 10–20 years in a typical foundation environment. If the crack continues to move, PU foam will eventually tear and re-injection may be needed.
Can I inject foundation cracks in winter?
The concrete substrate temperature must be at least 5°C for standard epoxy injection. Our winter-grade resin works down to 0°C. Basements and underground foundations typically stay above 5°C year-round, so winter injection is usually feasible.
Should I inject from inside or outside the foundation?
Always inject from the accessible side — typically the interior. Injection from inside is equally effective because the resin is pushed through the full wall thickness by injection pressure. Exterior injection adds the cost of excavation without improving results.
Is foundation crack injection a DIY project?
For non-structural cracks (shrinkage cracks, cold joint leaks), DIY PU injection kits are available and straightforward. For structural cracks in load-bearing foundation walls, engage a structural engineer for assessment and a qualified contractor for injection. Improper injection can mask a serious structural problem.
What if the crack comes back after injection?
If the injected crack re-opens, it means the root cause was not addressed. Epoxy is stronger than concrete, so the new crack forms adjacent to the repair (not through it). Address the root cause (underpin the foundation, relieve lateral pressure, improve drainage), then re-inject the new crack.
What viscosity epoxy should I use for foundation cracks?
For hairline cracks (0.1–0.5 mm): low viscosity (150–300 mPa·s) such as our XQ-EI-L. For wider cracks (0.5–5.0 mm): medium viscosity (800–1,500 mPa·s) such as our XQ-EI-M. Using too-high viscosity in narrow cracks results in incomplete penetration. Using too-low viscosity in wide cracks results in resin runout through the back face.
---
Related Guides:- Resin Injection for Concrete Foundations: Crack Repair & Waterproofing — Detailed resin selection data including viscosity-to-crack-width penetration tables.
- Concrete Crack Injection: Methods, Resin Types & Step-by-Step Guide — Comprehensive crack injection guide covering all concrete types.
- Epoxy Anchor Systems: Installation & Load Ratings — How epoxy adhesive systems are used for anchoring in concrete foundations.
- Two-Part Epoxy Adhesive Guide — Understanding the epoxy chemistry used in injection resins.
- Cementitious Grout: Types & Strength Data — Cementitious grout for foundation underpinning and void filling.
- Underwater Cement & Concrete Repair — Repair methods for foundations below the water table.
- Structural Adhesive for Concrete — Broader structural adhesive selection guide for concrete applications.