
Why Foundation Cracks Cannot Wait
A hairline crack in a concrete foundation — 0.2 mm wide today — becomes a 1.5 mm crack within 12 to 24 months. Freeze-thaw cycling widens it every winter. Hydrostatic pressure from the soil pushes water through it every rain event. Reinforcing steel behind the crack corrodes as moisture reaches it, expanding and pushing the crack wider still. What starts as a cosmetic issue becomes a structural deficiency that costs 10 to 50 times more to repair once the rebar has corroded and the concrete section has delaminated.
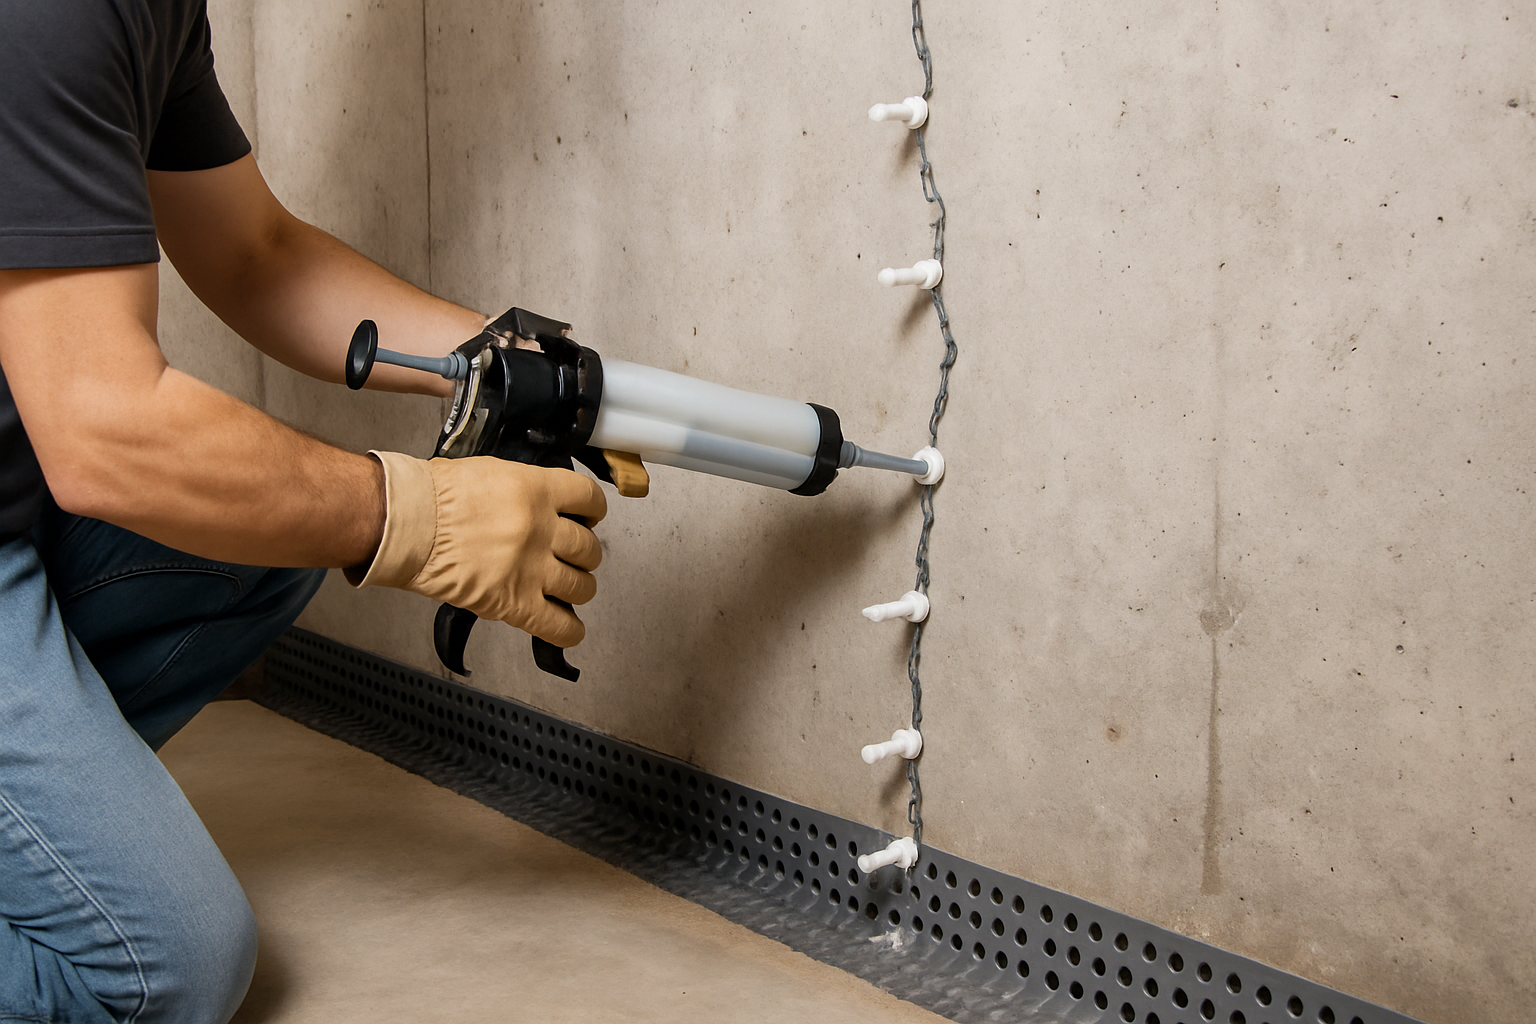
Resin injection stops this progression by filling the crack with a cured polymer that restores structural continuity, seals against water infiltration, and protects the reinforcement. It is performed entirely from the interior face of the foundation wall — no excavation, no dewatering, no landscape disruption.
As a manufacturer of epoxy and polyurethane injection resins for over 20 years, we have supplied materials for foundation repair projects ranging from residential basements to multi-level parking structures and industrial facilities across 30+ countries. This guide covers the practical engineering of resin injection for concrete foundations — material selection, injection procedures, cost analysis, and the mistakes we see contractors make repeatedly.
Two Types of Resin for Foundation Injection
There are only two resin families used for foundation crack injection: epoxy and polyurethane. Every other product — "acrylic injection," "silicone injection," "polymer injection" — is either a subset of these two or a marketing term. Understanding the fundamental differences determines whether the repair succeeds or fails.
Epoxy Injection — Structural Crack Restoration
Epoxy injection is the method specified by ACI 562 (Assessment, Repair, and Rehabilitation of Existing Concrete Structures) and EN 1504-5 (Products and Systems for the Protection and Repair of Concrete Structures) for restoring the tensile capacity of cracked concrete. The cured epoxy bonds the two faces of the crack together, creating a monolithic repair that is stronger than the original concrete.
How it works: Low-viscosity two-component epoxy (150 to 1,500 mPa·s) is injected through surface-mounted ports spaced at 150 to 300 mm along the crack. Injection pressure (0.2 to 0.5 MPa for gravity walls, up to 1.0 MPa for thick sections) forces the resin into the full depth of the crack. The epoxy cures by cross-linking polymerization over 24 to 72 hours, forming a rigid solid. When to use for foundations:- Structural cracks from settlement, overloading, or seismic events
- Dormant cracks (not actively moving) where the cause has been stabilized
- Foundation walls, grade beams, pile caps, and transfer beams
- Cracks in dry or dried conditions
Polyurethane Injection — Waterproofing and Flexible Sealing
Polyurethane injection is specified when the primary objective is water cutoff rather than structural restoration. The cured polyurethane forms a flexible foam or elastomer that can accommodate ongoing crack movement — something rigid epoxy cannot do.
How it works: Single-component moisture-curing polyurethane (or two-component hydrophobic polyurethane) is injected through mechanical packers drilled at 45 degrees into the crack plane. When the polyurethane contacts water in the crack, it reacts and expands (foaming types expand 5 to 20 times their liquid volume), filling the crack and creating a water barrier. When to use for foundations:- Active water leaks through foundation walls (hydrostatic pressure)
- Cracks that are still moving (live cracks from ongoing settlement)
- Below-grade walls where waterproofing is the priority, not structural restoration
- Emergency leak stoppage during construction
Epoxy vs Polyurethane: The Complete Comparison
This table represents data from our own formulations, tested in our laboratory. The values are specific to XINCHOR products — other manufacturers' products may differ.
| Property | Epoxy Injection Resin | Polyurethane Injection Resin |
|---|---|---|
| Primary function | Structural crack restoration | Waterproofing and water cutoff |
| Viscosity (low grade) | 150–300 mPa·s | 100–200 mPa·s (before reaction) |
| Viscosity (medium grade) | 800–1,500 mPa·s | Not applicable (single viscosity) |
| Tensile strength (cured) | 30–50 MPa | 2–8 MPa |
| Compressive strength | 60–80 MPa | 5–15 MPa |
| Bond to concrete | 3.0+ MPa (exceeds concrete tensile) | 0.5–1.5 MPa |
| Elongation at break | 1–3% (rigid) | 100–500% (flexible) |
| Crack width range | 0.1–5.0 mm | 0.5–10 mm (foam fills larger voids) |
| Minimum crack width | 0.1 mm (low-viscosity grade) | 0.3 mm |
| Reaction with water | None (water inhibits cure) | Required (moisture-curing) |
| Expansion | None (zero shrinkage) | 5–20x volume (foaming types) |
| Cure time (25°C) | 24–72 hours | 1–4 hours |
| Flexibility after cure | Rigid | Flexible to semi-rigid |
| Chemical resistance | Excellent (alkalis, mild acids) | Moderate |
| Service temperature | -40 to 60°C | -20 to 80°C |
| Re-injectable | Difficult (rigid solid) | Yes (can be re-injected through same ports) |
| Cost per linear meter | $15–40 (material only) | $8–20 (material only) |
Crack Width Determines Resin Selection
The most common specification error we see is using the wrong viscosity grade for the crack width. Too viscous, and the resin cannot penetrate — it fills only the first 20 to 30 mm from each port and leaves the middle of the crack empty. Too thin, and the resin flows out of the crack before it gels.
| Crack Width | Recommended Product | Viscosity | Injection Pressure | Port Spacing |
|---|---|---|---|---|
| 0.1–0.3 mm (hairline) | XQ-EI-L (Low Viscosity Epoxy) | 150–300 mPa·s | 0.2–0.3 MPa | 100–150 mm |
| 0.3–1.0 mm (fine) | XQ-EI-L or XQ-EI-M | 150–1,500 mPa·s | 0.3–0.5 MPa | 150–200 mm |
| 1.0–3.0 mm (medium) | XQ-EI-M (Medium Viscosity Epoxy) | 800–1,500 mPa·s | 0.3–0.5 MPa | 200–300 mm |
| 3.0–5.0 mm (wide) | XQ-EI-M + thixotropic additive | 1,500+ mPa·s | 0.2–0.3 MPa | 250–350 mm |
| 5.0+ mm (very wide) | Polyurethane foam + epoxy overlay | Varies | 0.3–0.5 MPa | 300–400 mm |
8-Step Foundation Crack Injection Process
This procedure applies to epoxy injection of structural foundation cracks. Polyurethane injection follows a similar sequence but uses mechanical packers drilled into the crack rather than surface-mounted ports.
Step 1: Crack Assessment and Mapping
Before injecting, document the crack — length, width (use a crack comparator card), orientation, depth, whether it is dormant or active, and whether water is present. Photograph the crack with a scale reference. This documentation is required by ACI 562 and determines the resin selection and injection parameters.
Dormant vs active crack determination: Monitor the crack width with a mechanical strain gauge over 2 to 4 weeks. If the width changes by more than 0.05 mm during the monitoring period, the crack is active — use flexible polyurethane, not rigid epoxy. If stable, proceed with epoxy.Step 2: Surface Preparation
Clean the concrete surface along both sides of the crack to a width of 50 mm. Remove paint, coatings, laitance, and loose concrete. The surface must be clean and dry for the surface seal to adhere.
Step 3: Install Injection Ports
Bond injection ports (T-ports or surface-mounted nipples) along the crack at the spacing determined by crack width (see table above). Apply them directly over the crack using our crack seal adhesive (XQ-FF) as the bonding agent.
Step 4: Seal the Crack Surface
Apply crack seal adhesive (XQ-FF) along the entire visible length of the crack between the ports. This surface seal confines the injected resin within the crack and prevents it from leaking out. Allow the seal to cure for a minimum of 4 hours at 25 degrees Celsius before injecting.
Step 5: Test with Compressed Air
Before injecting resin, test the port-to-port connectivity by injecting compressed air at low pressure (0.1 MPa) into the first port. Air should emerge from adjacent ports, confirming the crack is continuous. If no air passes, the crack may be blocked by debris — consider flushing with solvent or adding intermediate ports.
Step 6: Mix and Load Resin
For cartridge-based systems, attach the static mixing nozzle and discard the first 10 to 15 cm of mixed resin (the initial mix may be off-ratio due to unequal advancement of the two components). For bulk-mixed systems, follow the manufacturer's mix ratio precisely — our epoxy injection resins use a 3:1 A:B ratio by volume.
Step 7: Inject Resin — Bottom to Top
Begin injection at the lowest port (for vertical cracks) or at one end (for horizontal cracks). Inject slowly at 0.2 to 0.5 MPa until resin appears at the next adjacent port. Cap the injected port and move to the next one. Continue this port-to-port progression until the entire crack is filled.
Pressure control is critical: Excessive pressure (above 1.0 MPa for thin wall sections) can propagate the crack further or blow out the surface seal. If you see the surface seal lifting, reduce pressure immediately.Step 8: Post-Injection Verification
After the resin has cured (24 to 72 hours for epoxy, depending on temperature), remove the surface seal and ports by grinding. Inspect the surface for any areas where the resin did not fully penetrate — indicated by hollow sounds when tapped. If areas remain unfilled, re-inject through additional ports.
Quality verification method: Core through the repaired crack at a representative location and verify resin penetration depth visually. The core should show resin filling the full crack depth with no voids. This coring verification is required by many specifications for critical structural repairs.Cost Analysis: Resin Injection vs Alternative Foundation Repair Methods
Foundation repair costs vary dramatically by method. Resin injection is consistently the most cost-effective approach for crack widths up to 5 mm. Here is a cost comparison based on typical project data:
| Repair Method | Material Cost/m | Labor Cost/m | Total Cost/m | Time per 3m crack | Disruption Level |
|---|---|---|---|---|---|
| Epoxy injection | $15–40 | $30–60 | $45–100 | 2–3 hours | Minimal (interior) |
| Polyurethane injection | $8–20 | $25–50 | $33–70 | 1–2 hours | Minimal (interior) |
| Exterior excavation + membrane | $5–15 | $150–300 | $155–315 | 1–2 days | Major (excavation) |
| Carbon fiber stitching + injection | $30–60 | $50–100 | $80–160 | 3–5 hours | Minimal |
| Underpinning (helical piers) | N/A | N/A | $300–500/pier | Days | Major |
*Costs are indicative based on typical projects in developed markets. Actual costs depend on access conditions, crack depth, wall thickness, and local labor rates.*
When injection is not enough: If the crack is caused by ongoing structural movement (active settlement, lateral earth pressure overload), injection alone will not solve the problem — the crack will re-open. The cause must be addressed first (underpinning, drainage improvement, earth retention), and then injection can permanently seal the stabilized crack.For foundations requiring both crack repair and structural strengthening, consider combining injection with CFRP reinforcement — our carbon fiber fabric systems provide additional tensile and shear capacity to foundations that have been weakened by cracking.
7 Mistakes Contractors Make with Foundation Injection
Based on our technical support records from hundreds of foundation injection projects, these are the most common errors — and how to avoid them:
When to Combine Resin Injection with Carbon Fiber Reinforcement
For foundations with severe cracking (multiple parallel cracks, crack widths exceeding 3 mm, or visible rebar corrosion), injection alone may not restore adequate structural capacity. In these cases, we recommend a combined approach:
This combined approach is specified in ACI 440.2R (Guide for the Design and Construction of Externally Bonded FRP Systems for Strengthening Concrete Structures) and has been used successfully on parking structure foundations, bridge pile caps, and industrial facility grade beams.
Related Guides
- Crack Injection Resin: Low vs Medium Viscosity Selection — Detailed viscosity comparison for crack width matching.
- Structural Epoxy: Bond Strength Data & Application Guide — When structural epoxy bonding is needed alongside injection.
- Cementitious Grout Guide: Types & Mix Ratios — Grouting after resin injection has sealed the cracks.
- Resin Injection for Foundation Repair: Lab Data — Viscosity-to-crack-width penetration data from our laboratory.
- Concrete Repair Mortar: Types & Selection — Surface repair after injection is complete.
- CFRP Carbon Fiber Bridge Strengthening — Combining injection with CFRP reinforcement for maximum structural restoration.
Frequently Asked Questions
What is resin injection for concrete?
Resin injection is a structural repair technique where low-viscosity polymer resin (typically epoxy or polyurethane) is injected under controlled pressure into cracks in concrete structures. The resin fills the full depth and width of the crack, bonding the two crack faces together and restoring the structural continuity of the concrete. Epoxy resin injection restores tensile capacity (the cured bond is stronger than the original concrete), while polyurethane injection provides waterproofing and flexibility for active cracks. Resin injection is specified by ACI 562 and EN 1504-5 as the standard method for structural concrete crack repair.
How long does resin injection last in a foundation?
When properly applied to a dormant crack using the correct resin, the repair is permanent — the cured epoxy has a service life exceeding 50 years. The epoxy does not degrade under the alkaline conditions inside concrete (pH 12 to 13) and is resistant to groundwater minerals. The key qualifier is "dormant crack" — if the crack is still moving, rigid epoxy will eventually debond and the crack will re-open.
Can I inject a foundation crack that is leaking water?
Yes, but not with standard epoxy. Use hydrophobic polyurethane injection resin, which reacts with the water to cure and expand, sealing the leak. Once the water flow is stopped, you can return and inject epoxy into any remaining voids for structural restoration. Our technical team can recommend the specific polyurethane formulation based on the water flow rate and crack geometry.
How much does foundation crack injection cost?
For a typical basement wall crack (2 to 3 meters long, 0.3 to 1.0 mm wide), material cost is approximately $30 to $120 depending on the resin type. Professional contractor labor adds $60 to $180 for a total of $90 to $300 per crack. This compares to $1,500 to $5,000 or more for exterior excavation and membrane waterproofing of the same crack. Resin injection is typically 80 to 90% cheaper than excavation methods.
Is resin injection a permanent fix or a temporary patch?
Epoxy injection of a dormant structural crack is a permanent repair that restores the concrete to its original (or better) tensile capacity. The cured epoxy bond is stronger than the concrete itself — if the repaired section is loaded to failure, the concrete will break adjacent to the repair, not through it. Polyurethane injection for waterproofing is also long-lasting but may need re-injection after 10 to 15 years if the crack movement exceeds the polyurethane's elongation capacity.
What is the difference between epoxy injection and epoxy crack filler?
Epoxy injection uses low-viscosity resin (150 to 1,500 mPa·s) injected under pressure to fill the full depth of the crack from the interior. Epoxy crack filler (or paste) is a high-viscosity material (paste consistency) applied to the surface of the crack — it only fills the visible surface opening, not the interior. For structural foundation cracks, injection is the only acceptable method per ACI 562 and EN 1504-5. Surface filler is suitable only for cosmetic repair of non-structural surface cracks. For more on surface crack fillers, see our epoxy crack filler guide.