
Why Foundation Cracks Demand Immediate Attention
Foundation cracks are not cosmetic defects — they are symptoms of structural distress that worsen over time. A 0.3 mm crack in a foundation wall that is ignored today becomes a 1.5 mm crack next year as freeze-thaw cycles, hydrostatic pressure, and ongoing settlement widen the fissure. Water infiltration through foundation cracks causes reinforcement corrosion, mold growth, and progressive structural degradation that can cost 10 to 50 times more to repair if left untreated.
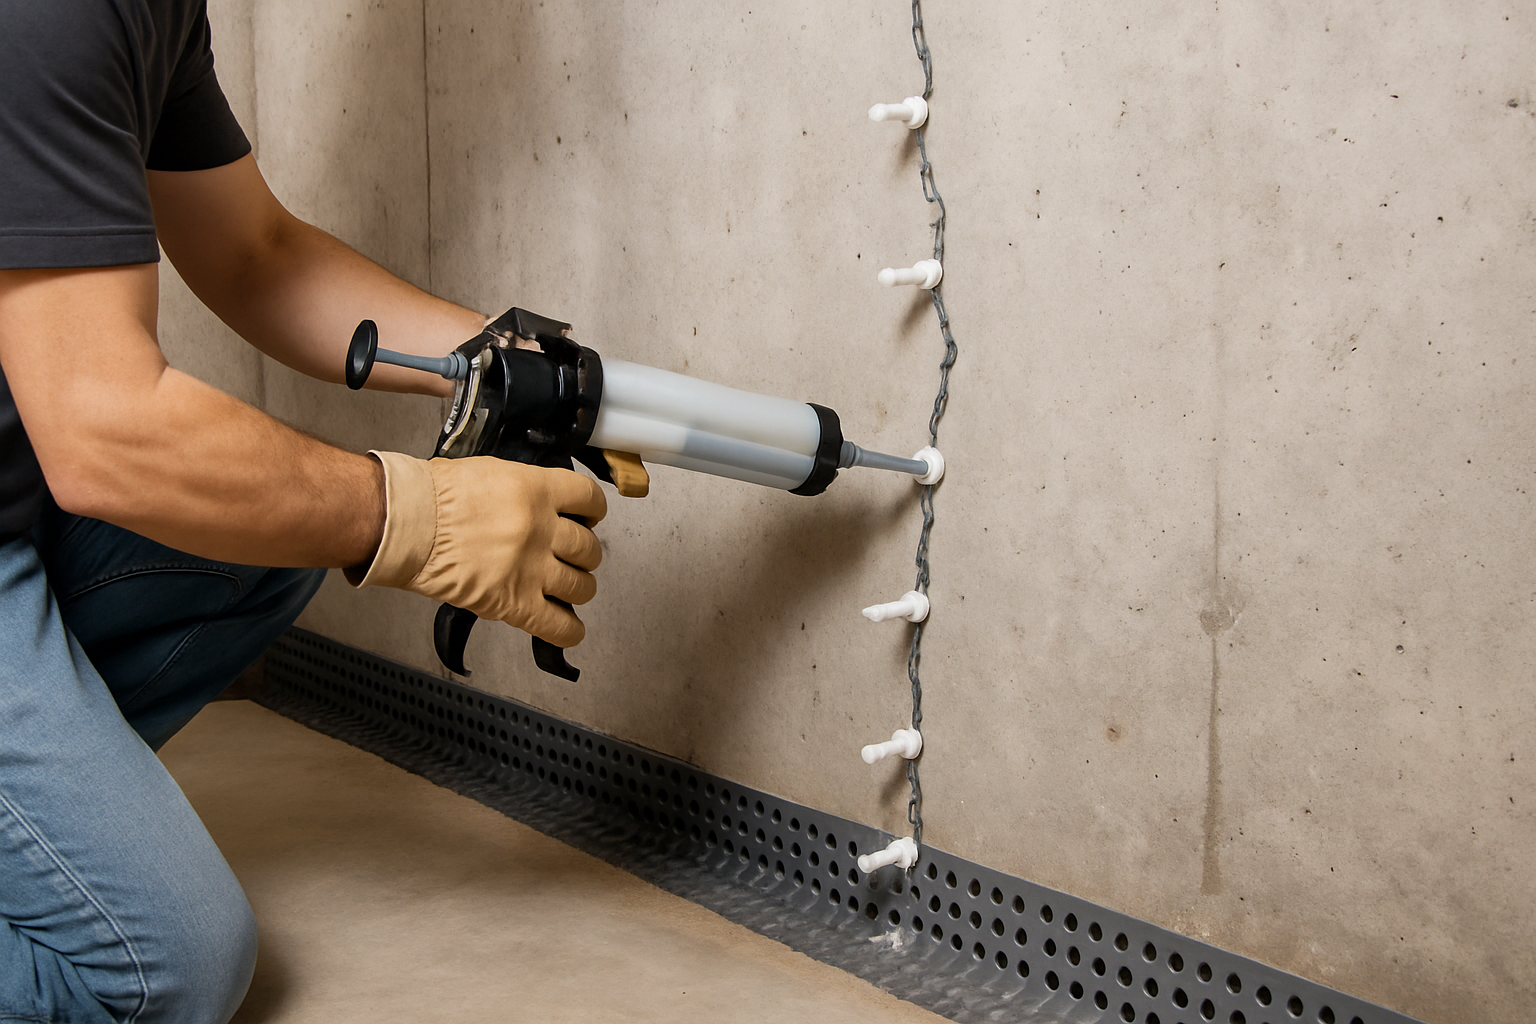
Resin injection is the most effective and least invasive method for repairing foundation cracks. Unlike excavation-and-membrane systems that require digging up the exterior, resin injection is performed entirely from inside the structure — no excavation, no landscape disruption, no dewatering of the surrounding soil.
As a manufacturer of epoxy and polyurethane injection systems, we have supplied materials for foundation repair projects ranging from single-family basements to multi-level parking structures and industrial facilities. This guide covers the material selection, injection procedures, and technical considerations specific to foundation applications.
Types of Resin Injection for Foundations
1. Epoxy Injection — Structural Crack Repair
Epoxy injection is the method specified by ACI 562 and EN 1504-5 for restoring the structural capacity of cracked concrete. When properly injected, the epoxy bonds the crack faces together with a tensile strength exceeding the concrete itself (epoxy bond strength ≥ 3.0 MPa vs. concrete tensile strength of 2.0 to 3.5 MPa).
When to use epoxy injection for foundations:- Structural cracks caused by overloading, settlement, or seismic events
- Cracks that have been stabilized (the cause has been addressed — settlement arrested, load reduced)
- Cracks in foundation walls, grade beams, pile caps, and transfer beams
- Dormant cracks (not actively moving) in dry or dried conditions
| Product | Viscosity | Crack Width Range | Tensile Strength | Best Foundation Application |
|---|---|---|---|---|
| XQ-EI-L (Low Viscosity) | 150–300 mPa·s | 0.1–1.0 mm | ≥ 30 MPa | Hairline structural cracks, prestressed pile caps |
| XQ-EI-M (Medium Viscosity) | 800–1,500 mPa·s | 0.5–5.0 mm | ≥ 40 MPa | Foundation wall cracks, settlement cracks |
2. Polyurethane Injection — Waterproofing
Polyurethane (PU) injection is the standard method for stopping water infiltration through foundation cracks and construction joints. The PU resin reacts with groundwater to form a flexible, closed-cell foam that seals the crack against hydrostatic pressure.
When to use PU injection for foundations:- Active water leaks through cracks, construction joints, or pipe penetrations
- Cracks that are still moving (live cracks from thermal expansion/contraction)
- Basement walls with seasonal water infiltration
- Foundation-to-slab construction joints that were not properly waterstop-sealed
| Property | XQ-PU (Standard) | XQ-PU-HP (High Pressure) |
|---|---|---|
| Expansion ratio | 5–20× | 3–10× |
| Water pressure resistance | Up to 3 bar | Up to 8 bar |
| Flexibility (Shore A) | 30–45 | 50–65 |
| Reaction time with water | 3–8 minutes | 1–3 minutes |
| Application | Basement walls, shallow foundations | Deep foundations, below water table |
3. Expanding Polyurethane Resin — Soil Stabilization and Void Filling
A specialized application for foundations: injecting expanding polyurethane resin into the soil beneath a settled foundation to fill voids, compact loose soil, and lift the foundation back to level. This is sometimes called "foam jacking" or "polyurethane slab lifting."
When to use expanding resin for foundations:- Foundation settlement due to soil washout or consolidation
- Void formation beneath foundation slabs on grade
- Slab lifting and releveling (±25 mm adjustment typical)
- Soil densification beneath spread footings
Foundation-Specific Injection Challenges
Challenge 1: Water Pressure
Foundation walls below the water table experience continuous hydrostatic pressure. For a foundation 3 meters below the water table, the water pressure at the base is approximately 0.3 bar (30 kPa). This pressure will push injection resin out of the crack as fast as you inject it — unless you use a material that reacts with water.
Solution: PU injection resin uses the water itself as a curing agent. When the resin contacts groundwater, it foams and solidifies in 3 to 8 minutes, creating a seal against the water pressure. For foundations deeper than 5 meters below the water table, use our high-pressure PU formulation (XQ-PU-HP) rated to 8 bar.Challenge 2: Accessibility from One Side Only
Foundations can typically only be accessed from the interior face. The exterior face is buried in soil. This means:
- Injection ports must be installed on the interior face only
- You cannot observe resin emergence on the exterior face (no visual confirmation of full-depth penetration)
- Surface sealing must be applied to the interior face to contain the injection pressure
Challenge 3: Reinforcement Corrosion Behind Cracks
If a foundation crack has been leaking for months or years, the reinforcing steel behind the crack is likely corroding. Injecting resin into the crack seals the moisture path and halts further corrosion, but it does not repair the section loss that has already occurred.
Assessment before injection:- Use a covermeter (pachometer) to locate reinforcement behind the crack
- Measure the concrete cover depth
- If cover is less than 15 mm and the crack has been wet for more than 2 years, consider half-cell potential testing to assess reinforcement condition
- If significant section loss is detected (more than 10% of bar diameter), supplement the injection with CFRP strengthening to compensate for the reduced steel area
Challenge 4: Multiple Crack Mechanisms
Foundation walls commonly develop cracks from multiple causes simultaneously:
| Crack Pattern | Typical Cause | Injection Strategy |
|---|---|---|
| Horizontal crack at mid-height | Lateral earth pressure (soil push) | Epoxy (structural) + CFRP strengthening if severe |
| Diagonal cracks from corners of openings | Stress concentration at window/door openings | Epoxy (structural) |
| Vertical cracks at regular intervals | Shrinkage during curing | PU (waterproofing) — typically non-structural |
| Step-pattern cracks following mortar joints (block walls) | Settlement or lateral pressure | PU (waterproofing) + evaluate foundation stability |
| Horizontal crack at the cold joint (wall-to-footing) | Construction joint — no waterstop installed | PU (waterproofing) |
Step-by-Step Foundation Injection Procedure
Step 1: Assessment
Map all cracks, noting width, pattern, and moisture condition. Determine the cause — settlement, lateral pressure, shrinkage, or thermal movement. Address the root cause before injection if it is ongoing (e.g., improve drainage to relieve hydrostatic pressure, underpin a settling foundation).
Step 2: Install Injection Ports
- Drill holes at 45° angles to intersect the crack at mid-depth of the wall
- Space ports at 200 to 300 mm intervals (approximately equal to the wall thickness)
- For 200 mm thick walls, drill to approximately 120 mm depth
- Install surface-mount or screw-in injection ports (packers)
Step 3: Seal the Surface
Apply a fast-curing epoxy paste (our XQ-SS surface seal) along the entire visible crack trace and around each injection port. This creates a pressure dam that forces the injected resin into the crack depth rather than leaking out the surface. Allow 4 hours minimum cure time.
Step 4: Inject
- For epoxy injection: Start from the lowest port. Inject slowly at 0.2 to 0.5 MPa until resin appears at the next port. Close the current port and advance.
- For PU injection: Start from the lowest port. Inject in short bursts (5 to 10 seconds), allowing the PU to react and expand. Over-injection of PU generates excessive expansion pressure that can damage the surface seal or even the concrete.
Step 5: Verify and Finish
After curing (24 to 48 hours for epoxy, 2 hours for PU):
- Check all ports for resin fill — dry ports indicate incomplete injection and require re-injection
- Remove surface-mounted ports
- Grind the surface seal flush with the wall surface
- Apply a waterproofing membrane or coating over the repair if the foundation is in a water-exposure zone
Resin Viscosity vs Crack Width: Which Resin Penetrates Which Crack?
This is the question contractors ask us most often — and the one that published guides answer least precisely. We tested penetration of four resin viscosities into concrete crack mockups at controlled widths:
| Resin Type | Viscosity (23°C) | 0.1 mm crack | 0.3 mm crack | 0.5 mm crack | 1.0 mm crack | 3.0 mm crack | 5.0+ mm crack |
|---|---|---|---|---|---|---|---|
| Ultra-low viscosity epoxy (XQ-ZJ-G01) | 120 mPa·s | Full fill at 0.2 MPa | Full fill gravity | Full fill gravity | Full fill gravity | Resin runs out — needs thixotropic | Not suitable |
| Low viscosity epoxy (XQ-ZJ-G02) | 350 mPa·s | Partial (70%) at 0.3 MPa | Full fill at 0.2 MPa | Full fill gravity | Full fill gravity | Full fill | Flows out |
| Medium viscosity epoxy (XQ-ZJ-G03) | 1,200 mPa·s | No penetration | Partial at 0.3 MPa | Full fill at 0.2 MPa | Full fill gravity | Full fill | Full fill |
| Hydrophilic PU foam | 200 mPa·s (pre-reaction) | Expands into crack | Expands, seals | Expands, seals | Over-expansion risk | Good void fill | Good void fill |
*Test conditions: Concrete block mockups with diamond-saw cuts at controlled widths. Injection pressure via hand pump. "Full fill" = resin emerged from opposite face of 200mm block. Temperature 23±2°C.*
How to read this table: Hairline cracks (≤0.2mm) demand ultra-low viscosity resin and positive pressure — gravity feed does not work. Cracks above 3mm need thixotropic or gel-consistency resin to prevent run-out. The most common specification error we see is using medium-viscosity resin on hairline cracks and wondering why the crack was not filled. Temperature matters: At 5°C, viscosity approximately doubles for epoxy systems. Our ultra-low viscosity resin at 120 mPa·s (23°C) becomes approximately 250 mPa·s at 5°C — moving it from "full fill at 0.2 MPa" to "partial fill" for 0.1mm cracks. If your project involves cold-weather injection of fine cracks, warm the cartridge to 20°C+ before injection.Epoxy Injection vs Polyurethane Injection: Material Science Comparison
Most guides compare epoxy and polyurethane injection by saying "epoxy is structural, PU is for waterproofing." That is correct but incomplete. Here is why they behave differently — explained at the formulation level:
| Property | Structural Epoxy (XQ-ZJ-G02) | Hydrophilic PU | Hydrophobic PU | Test Method |
|---|---|---|---|---|
| Primary purpose | Structural bond — restore monolithic load transfer | Water stop — seal against hydrostatic pressure | Void fill — displace water, flexible seal | — |
| Reaction mechanism | Amine-epoxy crosslinking (no water needed) | Reacts with water to expand 5–15× | Reacts with catalyst to form closed-cell foam | — |
| Viscosity (pre-reaction) | 350 mPa·s | 200 mPa·s | 300 mPa·s | Adapted ASTM D2196 |
| Expansion ratio | None (1:1 volume) | 5–15× depending on water available | 3–8× depending on formulation | Internal method |
| Tensile strength (cured) | 30–45 MPa | 0.5–2 MPa (foam) | 1–5 MPa (foam) | ASTM D638 |
| Bond strength to concrete | 3–5 MPa | 0.1–0.3 MPa | 0.2–0.5 MPa | ASTM C882 adapted |
| Elongation at break | 2–5% (rigid) | 100–300% (flexible) | 50–200% (semi-flexible) | ASTM D638 |
| Crack movement tolerance | None — rigid bond, re-cracks if substrate moves | High — accommodates ±2mm movement | Moderate — accommodates ±1mm | — |
| Water resistance | Excellent (impermeable once cured) | Moderate (hydrophilic = absorbs water) | Excellent (hydrophobic = repels water) | Internal method |
| Structural load transfer | Yes — restores 85–100% of original section capacity | No — foam has negligible structural strength | No | — |
| Best crack type | Dormant structural cracks in dry/damp conditions | Active water-leaking cracks, curtain grouting | Void filling behind walls, soil stabilization | — |
Why Foundation Crack Injection Fails: 7 Root Causes from Our Laboratory
We have analyzed hundreds of failed injection samples returned by contractors over the past decade. Here are the seven most common failure modes, ranked by frequency:
| Rank | Failure Mode | Frequency | Root Cause | What It Looks Like | Prevention |
|---|---|---|---|---|---|
| 1 | Incomplete penetration | 35% | Resin too viscous for crack width, or insufficient injection pressure | Resin visible at entry face but absent 20mm+ into crack | Match viscosity to crack width (see table above); increase pressure for fine cracks |
| 2 | Adhesion failure at resin-concrete interface | 20% | Wet/oily substrate, uncleaned crack faces, or wrong resin for conditions | Cured resin peels cleanly off concrete surface | Clean crack faces; use vinyl ester for damp conditions; degrease if oil is present |
| 3 | Incomplete cure (tacky or soft resin) | 15% | Incorrect A:B mix ratio due to static mixer failure or cold temperature | Resin is soft, rubbery, or sticky after specified cure time | Always use fresh static mixer nozzles; do not reuse. Warm cartridge if below 10°C |
| 4 | Re-cracking adjacent to repair | 10% | Rigid epoxy in an active (moving) crack — the crack simply migrates | New crack parallel to and within 5–10mm of the injected crack | Use flexible PU for active cracks, or install crack monitors before repair to verify dormancy |
| 5 | Surface seal failure during injection | 8% | Seal paste applied too thin, or injection pressure too high for seal strength | Resin leaks from surface rather than penetrating into crack | Apply seal paste minimum 3mm thick × 30mm wide; reduce injection pressure |
| 6 | Resin shrinkage | 7% | Over-exothermic cure in wide cracks (>5mm) with large resin volume | Visible gap between cured resin and crack wall | Inject in stages for wide cracks; use low-exotherm formulation |
| 7 | Foam over-expansion (PU) | 5% | Excess water contact with hydrophilic PU in flooded conditions | PU foam expands beyond crack, lifts surface seal, damages surrounding concrete | Control water flow before injection; use hydrophobic PU when water volume is high |
Cost Comparison: Foundation Injection Methods
| Method | Material Cost per Linear Meter of Crack | Labor Time | Total Installed Cost (est.) |
|---|---|---|---|
| Epoxy injection (structural) | $8–$15 | 20–30 min/m | $25–$50/m |
| PU injection (waterproofing) | $3–$8 | 10–20 min/m | $15–$30/m |
| Exterior excavation + membrane | — | — | $200–$500/m (total system) |
| Curtain grouting (interior membrane injection) | $15–$25 | 30–45 min/m | $40–$80/m |
Resin injection is typically 5 to 15 times less expensive than exterior excavation methods and can be completed in a single day for a typical residential foundation, compared to 3 to 5 days for excavation.
FAQ
Q: How long does foundation crack injection last? A: Epoxy injection is permanent — the cured epoxy is more durable than the concrete itself and does not degrade under normal foundation conditions (no UV exposure, stable temperature, pH 7 to 12). PU injection for waterproofing lasts 10 to 20 years in a typical foundation environment. If the crack continues to move (active settlement), the PU foam will eventually tear at the crack interface and re-injection may be needed. Q: Can I inject foundation cracks in winter? A: The substrate temperature must be at least 5°C for standard epoxy (our winter-grade XQ-EI-L-W works down to 0°C). Basements and underground foundations typically maintain temperatures above 5°C year-round, so winter injection is usually feasible. Exterior-exposed foundations (retaining walls, grade beams) may require temporary heating in cold climates. Q: Should I inject from inside or outside the foundation? A: Always inject from the accessible side — typically the interior. Injection from inside is equally effective because the resin is pushed through the full wall thickness by injection pressure. There is no structural advantage to exterior injection; it simply adds the cost and disruption of excavation. Q: Is foundation crack injection a DIY project? A: For non-structural basement wall cracks (shrinkage cracks, cold joint leaks), DIY PU injection kits are available and straightforward to use. However, structural cracks in load-bearing foundation walls should be assessed by a structural engineer and injected by a qualified contractor — improper injection can mask a serious structural problem and give a false sense of security. Q: What if the crack re-opens after injection? A: If the injected crack re-opens, it means the cause was not addressed. Epoxy-injected cracks that re-open indicate ongoing movement (settlement, continued overloading). The crack will typically form adjacent to the original repair (because the epoxy is stronger than the concrete). Address the root cause (underpin the foundation, relieve lateral pressure), then re-inject the new crack.Conclusion
Resin injection is the most effective, least invasive, and most economical method for repairing concrete foundation cracks — whether the goal is structural restoration (epoxy) or waterproofing (polyurethane). The key to success is correctly diagnosing the crack cause, choosing the right resin, and following proper injection procedures.
---
Related Guides:- Resin Injection for Concrete Crack Repair: Complete Guide — Epoxy vs polyurethane comparison, 8-step process, cost analysis.
- Epoxy Resin Injection for Foundation Repair: Methods & Cost Guide — Practical foundation crack injection guide with cost comparison and step-by-step procedures.
- Structural Epoxy: Bond Strength Data & Types — Structural epoxy adhesive used in crack injection and bonding.
- Cementitious Grout Guide: Types & Mix Ratios — Grouting after foundation crack injection.
- Concrete Crack Injection: Methods & Step-by-Step Guide — Comprehensive crack injection guide covering all concrete types.
- Underwater Cement & Concrete Repair — Repair methods for foundations below the water table.